
Name Change Entry in Galileo GDS : Each carrier has their own policies and procedures regarding name changes, and most of them require approval or authorization to process a name change.
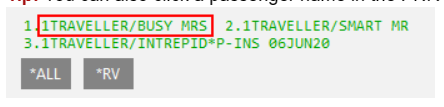
From the screenshot below, names display in green, this means they are interactive.
When you click on a name, it launches the Create/Edit Customer Information dialog
box.
What is name Change Entry in Galileo GDS
Depending on the state of the PNR/Booking File, there are different ways to get rid of passenger names:
- You can change guest names at any time as long as the PNR/Booking hasn’t been closed.
- If the PNR/Booking File has been closed, there may be limits on the carrier’s part. Most carriers need approval or authorization for major name changes, and each carrier has its own policies and processes.
Alternatively click on the icon at the bottom of the PNR viewer window or click
on PNR from the tool bar & select the menu option Create/Edit Customer
Information.
To Delete passenger names in Galileo GDS
1 – Important! Before asking a name change through Apollo (1V) or Travelport+ (1G), check with the carrier directly about how to make a name change for each carrier in the booking.
- You can call them directly or check the information on their websites to learn more about how to change your name.
2 – Ask each carrier in the order for a name change using that carrier’s process. Most of the time, carriers confirm permission in an SSR or vendor comment.
3 – Sync the name change that has been approved in Smartpoint. Syncing is done in different ways based on the type of change and the version of Smartpoint you are using.
- For versions of Smartpoint before 9.0, call the Travelport Help Desk.
- After Smartpoint 9.1, the agent can make some changes to itineraries that are eligible straight in Smartpoint. Contact the Travelport Help Desk for itineraries that are not qualified.
4 – Itineraries where an agent’s name can be changed. On the “Customer Information” screen, click on the “Name” tab.
Galileo Quick Reference Guide | Galileo GDS Commands
Tips : In the PNR Viewer, you can also click on a passenger’s name.
The Name tab of the Customer Information dialog box is displayed.
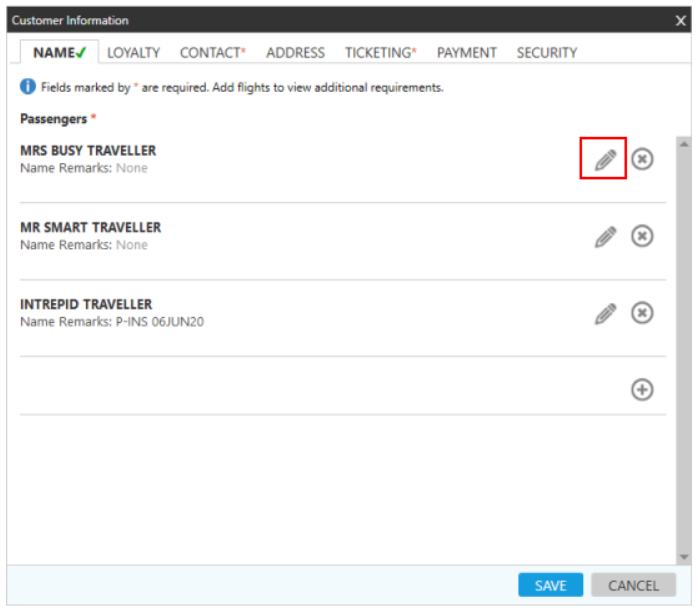
5 – Click the “Delete” button next to the passenger’s name to see the message.
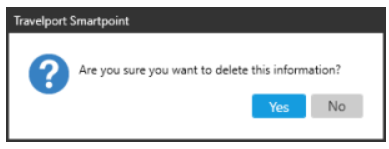
6 – Click Yes to confirm the deletion.
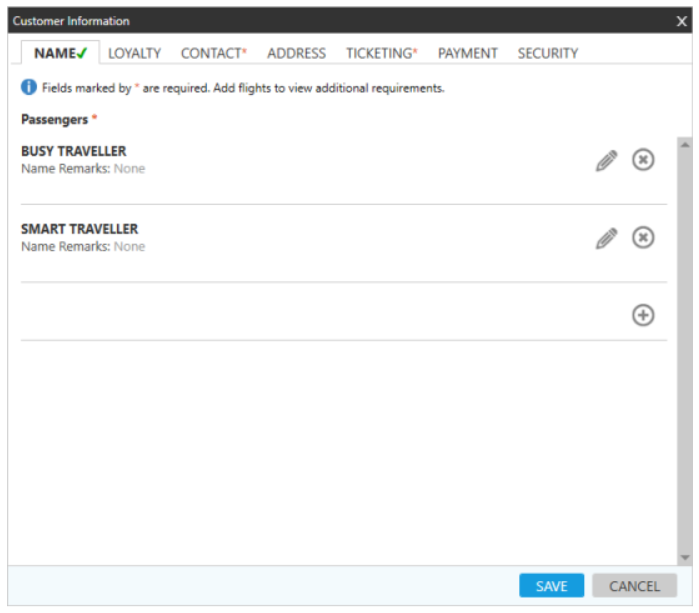
7 -Click Save .
- A review message is shown if an agent-requested syncing can be done.
- If an agent asks for a synchronization that can’t be done, an error report is sent back.
8 – Optional. Repeat Steps 4–6 for any other names in the PNR/Booking File.
9 – When you’re done making changes, click SAVE.
- If the suggested changes can be made without any limits, no messages are shown.
- If one or more of the changes you want to make aren’t allowed, the Confirm Name Change message will appear.
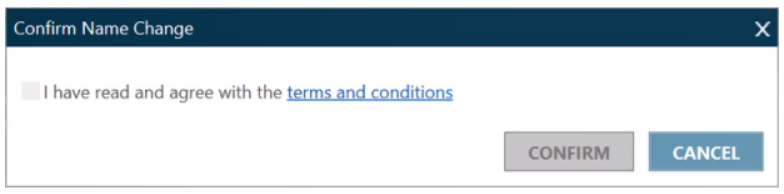
10 – Click the link for “Terms and Conditions” to see what you need to do to change your name.
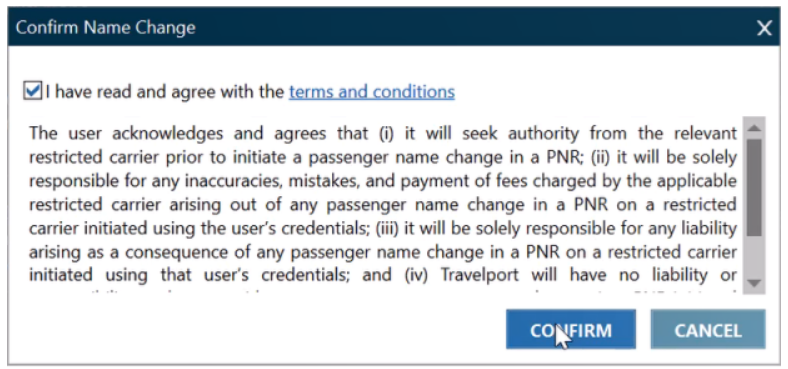
Tips: Even if there are several carriers in the schedule, the Confirm Name Change message only shows up once. The proof is based on the terms of the carrier that are the strictest.
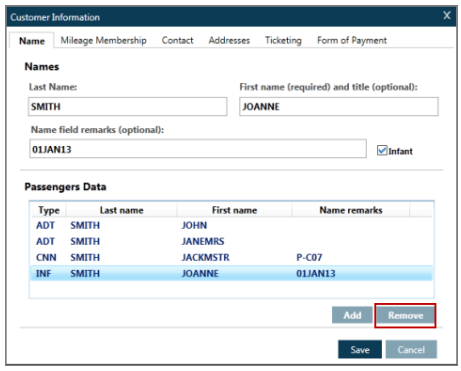
To change passenger names in Galileo GDS

To change the name simply select the passenger and overtype the data in the name
field boxes.
Should the passenger be no longer required in the Booking File, highlight the
passenger and click the Remove button:
Name change on an Ended Booking File
The majority of airlines do not permit name changes to be made after a Booking File has been ticketed. Check in Ask Travelport for guidelines. If the airline does not permit a name change, the system will respond as follows:
NAME CHANGE NOT ALLOWED